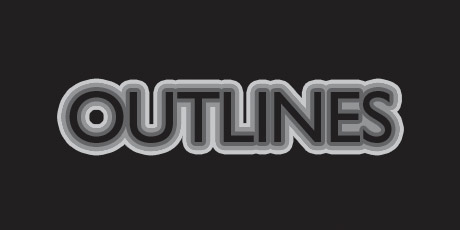
Photoshop Text Outline Effects
Need quick layer style that lets you apply multiple strokes (outlines) to a text or shape within Photoshop. Even though this is really simple in Illustrator via the Appearance Palette it’s not so straight forward in Photoshop (at least to my knowledge). This tutorial shows you how to hack a few of the built-in layer styles to add extra strokes outside of the actual stroke style.
Step 1: Create a new Photoshop document.
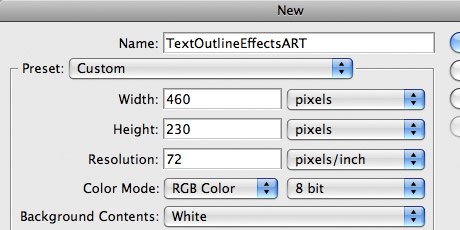
Step 1
Step 2: Fill the Background layer with medium black (R 35, G 31, B 32). Edit > Fill.
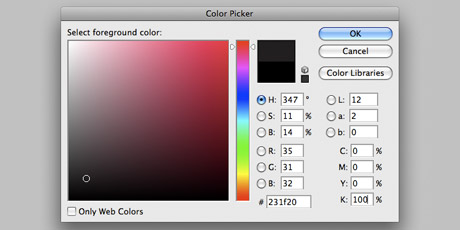
Step 2
Step 3: Add some white text to your document.

Step 3
Step 4: Add a Color Overlay style to your text layer. Set the Color Overlay fill to the same medium black as the Background layer (R 35, G 31, B 32). Don’t close the Layer Style dialog box just yet and make sure to check the Preview setting so that you can see your changes.
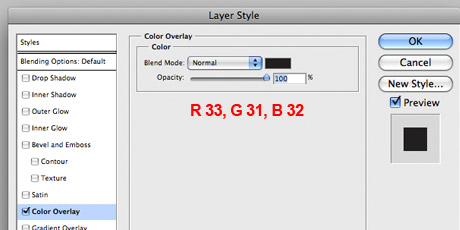
Step 4
Step 5: Add a Stroke style to your text layer by clicking the small check box beside “Stroke”. Set the size of the stroke to 4 px and the color to dark gray (R 99, G 100, B 102). That’s one basic stroke!
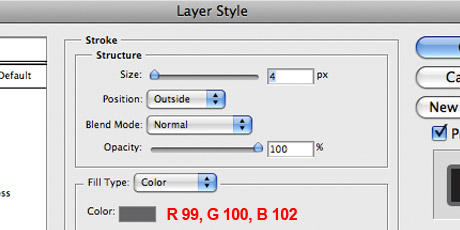
Step 5

Outline #1
Step 6: Now add the style Outer Glow to your text layer. Set the blend mode to normal, the opacity to 100%, the color to medium gray (R 147, G 149, B 152), the spread to 100%, and the size to 8 px. That’s two strokes!
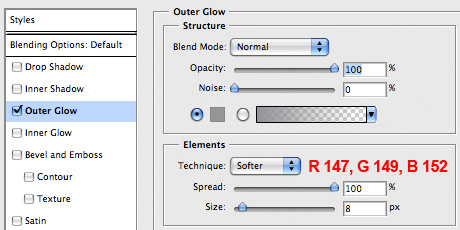
Step 6

Outline #2
Step 7: Finally, add the Drop Shadow style to your text layer. Set the blend mode to normal, the opacity to 100%, the distance to 0 px, the spread to 100%, and the size to 12 px. That’s three strokes all in one layer style which means you can change the font and size live, and even apply the layer style to any shape or line.
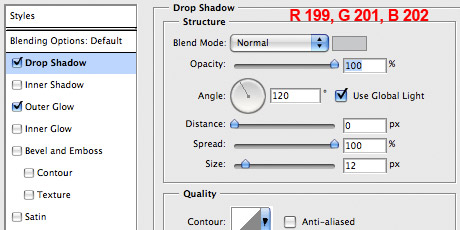
Step 7
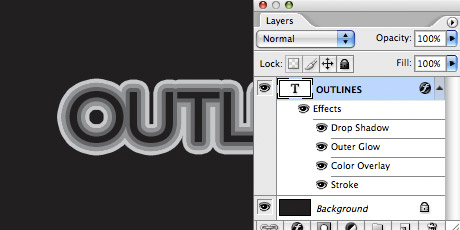
Outline #3
Done: Download sample file(s).

Final Result

Alternative Look #1

By http://thedesignplaybook.wordpress.com


No comments:
Post a Comment